xv6-八
前言
这篇博客研究xv6的锁机制
lock原因
lock的一个最重要的应用场景——解决条件竞争
条件竞争,即多个CPU并行的访问同一块内存,并且至少有一个执行写操作。当条件竞争出现时,往往会发生写入丢失或读取未完全更新的数据事件,从而引发更严重的bug。
而lock可以很好的避免条件竞争。lock可以确保互斥性,即确保同一时间只有一个进程访问临界区(可能被并行执行的部分)资源,从而根本上避免了不完整更新引发的bug。
lock机制
一般来说,内核会提供两类lock——spinlock(自旋锁)和sleeplock(信号量)
spinlock一般用于短时的互斥(关闭中断响应);而sleeplock往往用于长时的互斥
自旋锁
xv6的自旋锁依赖于C标准库的__sync_lock_test_and_set函数,其在riscv底层通过amoswap(Atomic Memory Operations swap)实现。其通过互斥的设置和访问共享变量,从而根据获取的旧值来判断当前自旋锁状态,如下所示1
2
3
4
5
6
7
8
9
10
11
12
13
14
15
16
17
18
19
20
21
22
23
24
25
26
27
28
29
30
31
32
33
34
35
36
37
38
39
40
41
42
43
44
45
46
47
48// Acquire the lock.
// Loops (spins) until the lock is acquired.
void
acquire(struct spinlock *lk)
{
push_off(); // disable interrupts to avoid deadlock.
if(holding(lk))
panic("acquire");
// On RISC-V, sync_lock_test_and_set turns into an atomic swap:
// a5 = 1
// s1 = &lk->locked
// amoswap.w.aq a5, a5, (s1)
while(__sync_lock_test_and_set(&lk->locked, 1) != 0) {
;
}
}
// Release the lock.
void
release(struct spinlock *lk)
{
if(!holding(lk))
panic("release");
lk->cpu = 0;
// Tell the C compiler and the CPU to not move loads or stores
// past this point, to ensure that all the stores in the critical
// section are visible to other CPUs before the lock is released,
// and that loads in the critical section occur strictly before
// the lock is released.
// On RISC-V, this emits a fence instruction.
__sync_synchronize();
// Release the lock, equivalent to lk->locked = 0.
// This code doesn't use a C assignment, since the C standard
// implies that an assignment might be implemented with
// multiple store instructions.
// On RISC-V, sync_lock_release turns into an atomic swap:
// s1 = &lk->locked
// amoswap.w zero, zero, (s1)
__sync_lock_release(&lk->locked);
pop_off();
}
具体来说,在获取lock时,其通过循环调用__sync_lock_test_and_set(),尝试互斥的将1写入共享变量。如果获取的旧值为0,则表明此时还没有其他进程获取锁,并且当前进程已经获取锁(将1写入);否则表明其他进程已经获取锁,共享变量的值没有改变。
而释放lock时,由于当前进程独占lock,则只需执行一次__sync_lock_release(),从而将0写入共享变量。
这里需要特别注意,由于自旋锁可能在进程和中断处理中被使用到,因此需要需要首先关闭中断,从而避免死锁产生(例如获取tickslock锁,然后响应时钟中断)
信号量
对于诸如文件系统等,其操作十分耗时,持有自旋锁会导致CPU空转,极大地降低了内核的效率。因此,合理的方式是让当前未成功获取锁的进程睡眠(前面xv6-七),直到持有锁的进程释放掉锁,此时在重新获取锁即可。1
2
3
4
5
6
7
8
9
10
11
12
13
14
15
16
17
18
19
20
21void
acquiresleep(struct sleeplock *lk)
{
acquire(&lk->lk);
while (lk->locked) {
sleep(lk, &lk->lk);
}
lk->locked = 1;
lk->pid = myproc()->pid;
release(&lk->lk);
}
void
releasesleep(struct sleeplock *lk)
{
acquire(&lk->lk);
lk->locked = 0;
lk->pid = 0;
wakeup(lk);
release(&lk->lk);
}
Lab locks
本次lab用来加深对于xv6的锁机制的理解
Memory allocator
要求
Your job is to implement per-CPU freelists, and stealing when a CPU’s free list is empty. You must give all of your locks names that start with “kmem”. That is, you should call initlock for each of your locks, and pass a name that starts with “kmem”. Run kalloctest to see if your implementation has reduced lock contention. To check that it can still allocate all of memory, run usertests sbrkmuch. Your output will look similar to that shown below, with much-reduced contention in total on kmem locks, although the specific numbers will differ. Make sure all tests in usertests pass. make grade should say that the kalloctests pass.
分析
避免互斥的最好办法就是避免竞争。
自然地,为了避免多个CPU在内存分配或释放时,频繁的申请kmem的互斥锁,则理想的办法就是每一个CPU管理一个自己的内存空闲链表。
其申请或释放都首先在当前CPU对应的空闲链表上进行操作,如果不满足的话再遍历其余的CPU空闲链表即可
实现
首先为每一个CPU实现自己的内存空闲链表,通过数组的形式统一进行管理即可1
2
3
4
5
6
7
8
9
10
11
12
13
14
15// kernel/kalloc.c
/**
* 每个CPU一个本地的空闲链表,其下标为CPU对应的cpuid()
*
* 分配时
* 首先在本地的空闲链表中进行查找;未找到的话,依次遍历所有CPU的空闲链表
*
* 释放时
* 直接释放到本地的空闲链表中即可
*/
struct {
struct spinlock lock;
struct run *freelist;
} kmems[NCPU];
其次分别实现申请内存和释放内存的操作即可。
对于申请内存,正如前面分析的,首先从当前CPU的空闲链表中尝试获取;如果当前CPU的空闲链表中内存不足的话,则依次遍历周边CPU的内存即可1
2
3
4
5
6
7
8
9
10
11
12
13
14
15
16
17
18
19
20
21
22
23
24
25
26
27
28
29// kernel/kalloc.c
/**
* 首先从本地空闲链表中申请内存
* 需要关中断保证cpuid的正确性
*
* 如果未申请到,则遍历所有的CPU的空闲链表
*/
void *
kalloc(void)
{
struct run *r = (void*)0;
push_off();
int base = cpuid();
for(int i = 0; i < NCPU && !r; ++i) {
int id = (base + i) % NCPU;
acquire(&kmems[id].lock);
r = kmems[id].freelist;
if(r)
kmems[id].freelist = r->next;
release(&kmems[id].lock);
}
pop_off();
if(r)
memset((char*)r, 5, PGSIZE); // fill with junk
return (void*)r;
}
对于释放的话,只需要释放到当前CPU的空闲链表中即可。由于不存在无法释放的情况,则自然和其余CPU的空闲链表结构无关1
2
3
4
5
6
7
8
9
10
11
12
13
14
15
16
17
18
19
20
21
22
23
24
25
26
27// kernel/kalloc.c
/**
* 将空闲内存释放到CPU的本地空闲链表中
* 获取cpuid时,需要关中断,保证正确性
*/
void
kfree(void *pa)
{
struct run *r;
if(((uint64)pa % PGSIZE) != 0 || (char*)pa < end || (uint64)pa >= PHYSTOP)
panic("kfree");
// Fill with junk to catch dangling refs.
memset(pa, 1, PGSIZE);
r = (struct run*)pa;
push_off();
int id = cpuid();
acquire(&kmems[id].lock);
r->next = kmems[id].freelist;
kmems[id].freelist = r;
release(&kmems[id].lock);
pop_off();
}
最后则是物理内存的初始化,为了最大化的复用原始代码,除了初始化每个CPU的空闲链表结构后,其余基本不变——也就是,一开始所有的内存块都会存储在0号CPU的空闲链表中1
2
3
4
5
6
7
8
9
10
11
12
13
14
15
16
17
18
19
20
21
22
23// kernel/kalloc.c
void
kinit()
{
for(int i = 0; i < NCPU; ++i)
initlock(&kmems[i].lock, "kmem");
freerange(end, (void*)PHYSTOP);
}
/**
* 该函数仅在内核初始化时调用
* 此时有且仅有一个进程,则无需上锁
*/
void
freerange(void *pa_start, void *pa_end)
{
char *p;
p = (char*)PGROUNDUP((uint64)pa_start);
for(; p + PGSIZE <= (char*)pa_end; p += PGSIZE)
kfree(p);
}
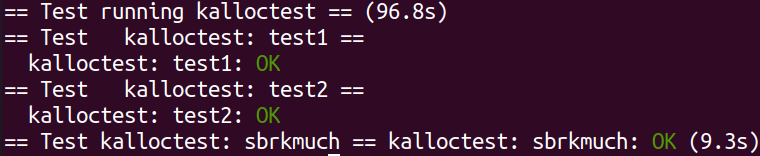
结果
执行如下命令,完成实验测试1
make GRADEFLAGS="kalloc" grade
Buffer cache
要求
Modify the block cache so that the number of acquire loop iterations for all locks in the bcache is close to zero when running bcachetest. Ideally the sum of the counts for all locks involved in the block cache should be zero, but it’s OK if the sum is less than 500. Modify bget and brelse so that concurrent lookups and releases for different blocks that are in the bcache are unlikely to conflict on locks (e.g., don’t all have to wait for bcache.lock). You must maintain the invariant that at most one copy of each block is cached. When you are done, your output should be similar to that shown below (though not identical). Make sure usertests still passes. make grade should pass all tests when you are done.
分析
buffer cache是文件系统中的重要抽象,其主要用于缓冲磁盘数据。其结构如下所示1
2
3
4
5
6
7
8
9
10
11
12
13// kernel/buf.h
struct buf {
int valid; // has data been read from disk?
int disk; // does disk "own" buf?
uint dev;
uint blockno;
struct sleeplock lock;
uint refcnt;
struct buf *prev; // LRU cache list
struct buf *next;
uchar data[BSIZE];
};
对于buffer cache,我们目前不需要了解太多,只需要明确如下几点即可
- 为了避免频繁读取磁盘内容到buffer cache中,在为磁盘分配cache时采用Least Recently Used策略,并通过链表实现
- 每个磁盘的一个块只能有一个cache(linux内核貌似不是这样的机制?),否则会导致程序读取磁盘数据不一致
- 可以将buffer cache简单理解为内存,其提供申请和释放功能
类似于前面的内存分配,为了避免多个CPU在buffer cache分配或释放时,频繁的申请bcache的互斥锁,则理想的办法就是分成多个bucket(这里通过blockno获取在bucket中的下标)。
同样的,其申请或释放都首先在当前bucket对应的LRU链上进行操作,如果不满足的话再遍历其余的LRU链表即可
实现
首先为每个bucket实现对应的数据结构,并同样通过数组的形式统一进行管理1
2
3
4
5
6
7
8
9
10
11
12
13
14
15// kernel/param.h
// kernel/bio.c
struct {
struct buf buf[NBUF];
// Linked list of buffers in same bucket, through prev/next.
// Sorted by how recently the buffer was used.
// head.next is most recent, head.prev is least.
struct buf heads[BUFBUCKET];
struct spinlock locks[BUFBUCKET];
} bcache;
其次,实现申请buffer cache的算法。这里需要特别注意锁的使用,注意如下几点
- 避免条件竞争:由于整个申请分为两部分——在当前bucket搜索和在其余bucket中搜索。则如果在中间时刻释放锁,则可能因为条件竞争导致一个block有多个buffer cache对应
- 避免死锁:如果为了避免上述条件竞争,而在持有当前bucket锁的基础上,申请其余bucket锁,则会导致死锁产生
1
2
3
4
5
6
7
8
9
10
11
12
13
14
15
16
17
18
19
20
21
22
23
24
25
26
27
28
29
30
31
32
33
34
35
36
37
38
39
40
41
42
43
44
45
46
47
48
49
50
51
52
53
54
55
56
57
58
59
60
61
62
63
64
65
66
67
68
69
70
71
72
73
74
75
76// kernel/bio.c
// Look through buffer cache for block on device dev.
// If not found, allocate a buffer.
// In either case, return locked buffer.
static struct buf*
bget(uint dev, uint blockno)
{
struct buf *b;
int base = blockno % BUFBUCKET;
// Is the block already cached?
acquire(&bcache.locks[base]);
for(b = bcache.heads[base].next; b != &bcache.heads[base]; b = b->next){
if(b->dev == dev && b->blockno == blockno){
b->refcnt++;
release(&bcache.locks[base]);
acquiresleep(&b->lock);
return b;
}
}
// Not cached.
// Recycle the least recently used (LRU) unused buffer.
for(b = bcache.heads[base].prev; b != &bcache.heads[base]; b = b->prev) {
if(b->refcnt == 0) {
b->dev = dev;
b->blockno = blockno;
b->valid = 0;
b->refcnt = 1;
release(&bcache.locks[base]);
acquiresleep(&b->lock);
return b;
}
}
release(&bcache.locks[base]);
for(int i = 1; i < BUFBUCKET; ++i) {
int idx = (base + i) % BUFBUCKET;
acquire(&bcache.locks[idx]);
for(b = bcache.heads[idx].prev; b != &bcache.heads[idx]; b = b->prev) {
if(b->refcnt == 0) {
b->dev = dev;
b->blockno = blockno;
b->valid = 0;
// unlink the buf from idx bucket
b->prev->next = b->next;
b->next->prev = b->prev;
release(&bcache.locks[idx]);
acquire(&bcache.locks[base]);
// insert the buf as least recently used cache
b->next = &bcache.heads[base];
b->prev = bcache.heads[base].prev;
bcache.heads[base].prev->next = b;
bcache.heads[base].prev = b;
for(b = bcache.heads[base].next; b != &bcache.heads[base]; b = b->next) {
if(b->dev == dev && b->blockno == blockno){
b->refcnt++;
release(&bcache.locks[base]);
acquiresleep(&b->lock);
return b;
}
}
release(&bcache.locks[base]);
panic("bget: code can't arrive here!");
}
}
release(&bcache.locks[idx]);
}
panic("bget: no buffers");
}
释放buffer cache的逻辑就很简单,直接释放到当前bucket中即可,需要注意插入的顺序即可(即LRU策略)1
2
3
4
5
6
7
8
9
10
11
12
13
14
15
16
17
18
19
20
21
22
23
24
25
26
27
28
29
30
31
32
33
34
35
36
37
38
39
40
41
42
43
44
45
46
47
48
49
50
51
52
53// kernel/bio.c
// Release a locked buffer.
// Move to the head of the most-recently-used list.
void
brelse(struct buf *b)
{
int idx = b->blockno % BUFBUCKET;
if(!holdingsleep(&b->lock))
panic("brelse");
releasesleep(&b->lock);
acquire(&bcache.locks[idx]);
b->refcnt--;
if (b->refcnt == 0) {
// no one is waiting for it.
b->next->prev = b->prev;
b->prev->next = b->next;
b->next = bcache.heads[idx].next;
b->prev = &bcache.heads[idx];
bcache.heads[idx].next->prev = b;
bcache.heads[idx].next = b;
}
release(&bcache.locks[idx]);
}
最后则是初始化,基本和原始的代码一致。其需要特别为每个**bucket**的相关数据结构进行初始化即可,并且一开始将所有的**buffer cache**放置在**bucket0**中
```c
// kernel/bio.c
void
binit(void)
{
struct buf *b;
for(int i = 0; i < BUFBUCKET; ++i) {
initlock(&bcache.locks[i], "bcache.bucket");
// Create linked list of buffers
bcache.heads[i].prev = &bcache.heads[i];
bcache.heads[i].next = &bcache.heads[i];
}
for(b = bcache.buf; b < bcache.buf+NBUF; b++) {
b->next = bcache.heads[0].next;
b->prev = &bcache.heads[0];
initsleeplock(&b->lock, "buffer");
bcache.heads[0].next->prev = b;
bcache.heads[0].next = b;
}
}
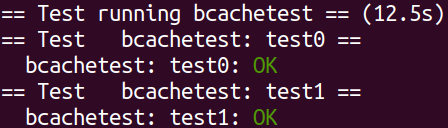
结果
执行如下命令,完成实验测试1
make GRADEFLAGS="bcache" grade